Integration Documentation (Android)
|
Collect
- Before using, please read the Data Model
- SDK Release Notes can be found in Release Notes
- Plugin Release Notes can be found in Release Notes
1. Integrate Sensors Analytics SDK
1.1. Introduce the Plugin
In the project level build.gradle file, add the dependency android-gradle-plugin2:
buildscript { repositories { mavenCentral() jcenter() } dependencies { // 添加 gradle 3.2.0+ 依赖 classpath 'com.android.tools.build:gradle:3.5.3' // 添加神策分析 android-gradle-plugin2 依赖 classpath 'com.sensorsdata.analytics.android:android-gradle-plugin2:3.5.3' } }In the main module's build.gradle file, apply the com.sensorsdata.analytics.android plugin dependency:
apply plugin: 'com.android.application' // 应用 com.sensorsdata.analytics.android 插件 apply plugin: 'com.sensorsdata.analytics.android' dependencies { }- For how to use the plugin and common configurations in AGP 8.0+ versions, please refer to the SDK Plugin Instructions.
- The Android Plugin requires Android Gradle Plugin 3.2.0+; otherwise, the event tracking for element clicks and page views of Fragments will not be triggered, and the App and H5 integration will be affected.
- Dependency relationship between the Plugin and SDK versions:
Plugin Version Available SDK Version Range v4.0.0 <= Plugin Version v6.6.9 <= SDK Version v3.5.2 <= plugin version <= 3.5.4 v6.5.3 <= SDK version <= v6.6.8 v3.5.0 <= plugin version <= 3.5.1 v6.5.0 <= SDK version <= v6.5.2 v3.4.0 <= plugin version <= 3.4.9 v5.4.3 <= SDK version <= v6.4.4 v3.3.9 == Plugin version v5.4.2 == SDK version v3.3.4 <= plugin version <= v3.3.8 v5.1.0 <= SDK version <= v5.4.1 v3.2.12 <= plugin version <= v3.3.3 v4.3.2 <= SDK version <= v5.4.1 v3.2.4 <= plugin version <= v3.2.11 v4.0.7 <= SDK version <= v5.4.1 v3.0.0 <= plugin version <= v3.2.1 v3.0.4 <= SDK version <= v5.4.1
1.2. Introduce the SDK
1.2.1. Integration with Maven dependency
Add SDK dependency in the main module's build.gradle file:
apply plugin: 'com.android.application' // 应用 com.sensorsdata.analytics.android 插件 apply plugin: 'com.sensorsdata.analytics.android' dependencies { // 添加 Sensors Analytics SDK 依赖 implementation 'com.sensorsdata.analytics.android:SensorsAnalyticsSDK:6.6.7' }- The minimum system version required by the Android SDK is API 14 (Android 4.0)
- Currently, the Android SDK (aar format) has a size of approximately 800 KB
Recommended version
warning
- If you do not need to integrate all the functions in the SDK, you can exclude some modules individually, such as excluding fully buried modules:
implementation ('com.sensorsdata.analytics.android:SensorsAnalyticsSDK:6.6.7') {
exclude(group:'com.sensorsdata.analytics.android', module:'autoTrack')
}
SDK submodule version number v0.2.0, submodule name list:name module core core module advert advert module autoTrack Full Burying Module encrypt Encryption Module exposure Exposure Module push Push Module visual Visual Module - If you are using Android plugin 4.0.0+ and excluding certain modules using exclude, or integrating only part of the modules via aar, for excluded and not added modules, you need to configure disableModules to exclude them. For more information, please refer to: plugin disableModules configuration.
1.2.2. Offline aar package integration
The offline aar package supports on-demand integration. Please download the relevant SDK from SDK Releases according to your business needs and reference the SDK.
| AAR Name | Function Description | Required |
|---|---|---|
sa_core.aar | Basic module containing basic code tracking | Required |
sa_autoTrack.aar | Full Analytics Module | Optional |
sa_visua.aar | Visual Heatmap Module | Optional |
sa_push.aar | Push Module | Optional |
sa_encrypt.aar | Encryption Module | Optional |
sa_adver.aar | Advertisement Channel Module | Optional |
| sa_exposure.aar | Exposure Module | Optional |
2. Initialize Sensors Analytics SDK
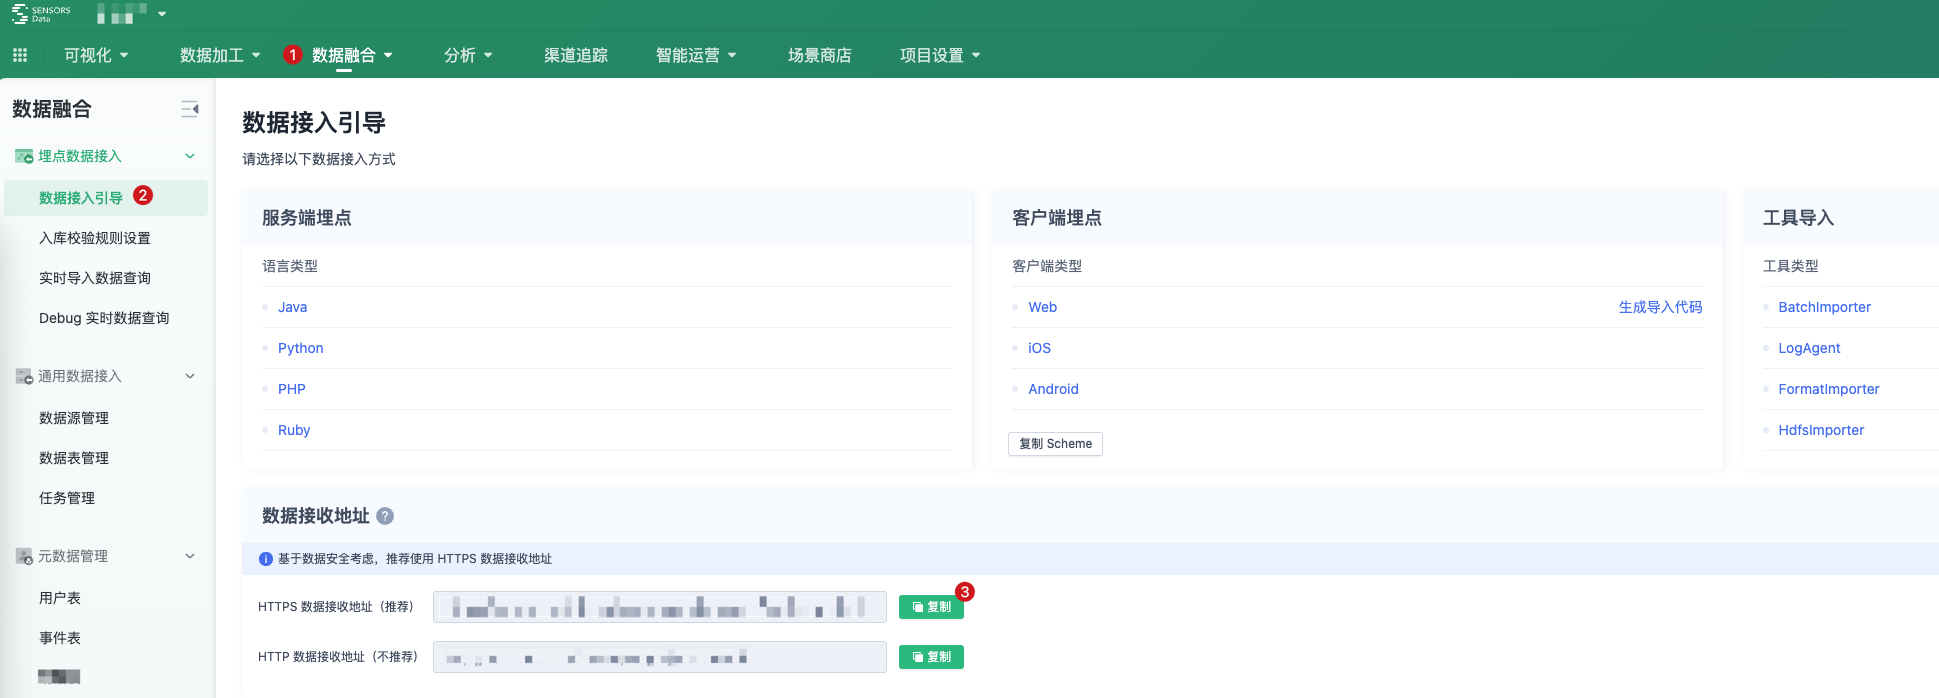
2.1. Get Project Data Receiving URL
- Each project has a separate data receiving URL
- Please use the account of administrator to obtain the data receiving URL of the corresponding project
2.2. Initialize SDK
In the Application onCreate() method, call SensorsDataAPI.startWithConfigOptions() function synchronously to initialize the SDK:
String SA_SERVER_URL = "数据接收地址"; // 初始化配置 SAConfigOptions saConfigOptions = new SAConfigOptions(SA_SERVER_URL); // 开启全埋点 saConfigOptions.setAutoTrackEventType(SensorsAnalyticsAutoTrackEventType.APP_CLICK | SensorsAnalyticsAutoTrackEventType.APP_START | SensorsAnalyticsAutoTrackEventType.APP_END | SensorsAnalyticsAutoTrackEventType.APP_VIEW_SCREEN) //开启 Log .enableLog(true); /** * 其他配置,如开启可视化全埋点 */ // 需要在主线程初始化神策 SDK SensorsDataAPI.startWithConfigOptions(this, saConfigOptions);Delaying the initialization of the SDK will cause inaccurate collection of full-page data and abnormal function of visual full-page and click analysis. If the app has compliance requirements, refer to the Android Compliance Steps.
2.2.1. Permission Configuration Instructions
The SDK requires four permissions in total:
Permission | Purpose |
|---|---|
| INTERNET | Required permission, allows the app to send statistical data, SDK requires this permission to send event data |
| ACCESS_NETWORK_STATE | Required permission, allows the app to detect network state, SDK will choose whether to send data based on the network state |
| READ_PHONE_STATE | Optional permission, allows the application to obtain the device IMEI. This permission is used for App promotion and collecting the $carrier attribute |
| ACCESS_WIFI_STATE | Optional permission, allows the application to obtain the MAC address. This permission is used for App promotion |
The SDK is used by default to simplify the integration steps AndroidManifest.xml The above four permissions are registered in. If you want to remove SDK registration permissions, you can usetools:node="remove" configuration. About tools:node="remove" detailed instructions can be found on Googleofficial document, Configuration code reference:
<uses-permission android:name="android.permission.READ_PHONE_STATE" tools:node="remove" />3. Configure Scheme
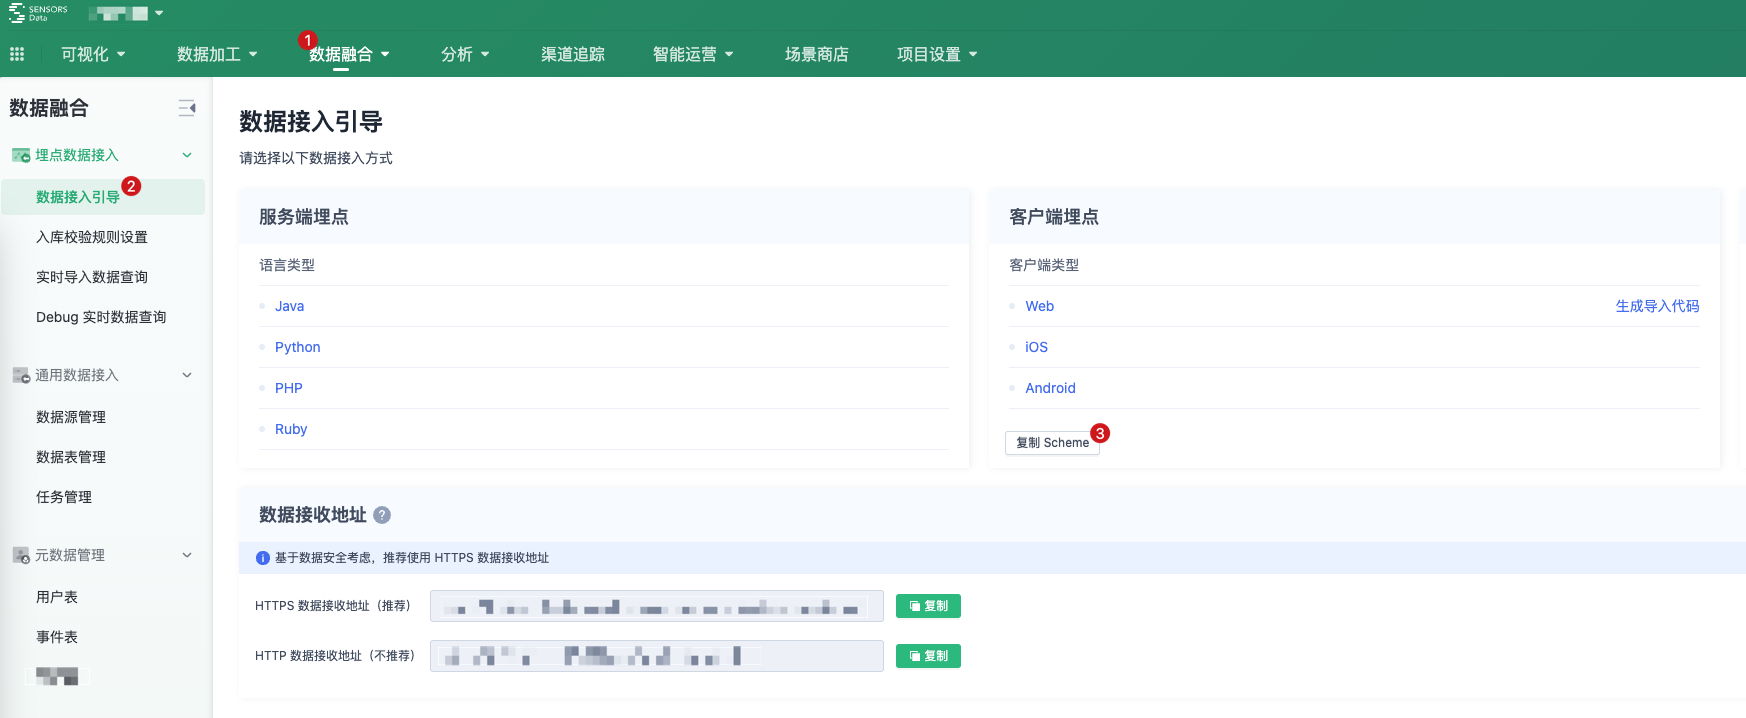
3.1. Get Project Scheme
- The Scheme of the project needs to be obtained by an administrator account.
- Multiple schemes for different projects can be configured in the App project.
3.2. Add Scheme in the App.
When using functions such as Real-time Debug View, App Click Analysis, and Visualized Full-Track, which require scanning QR codes in the Sensors Analytics system, you need to configure a scheme for a specific activity. After configuration, scanning the QR code can launch the corresponding activity page and establish a connection with the Sensors Analytics system to use related functions.
In the AndroidManifest file, configure the following activity and replace the value of the scheme with the value in your project.
<!-- Android 12 需添加 android:exported="true"--> <activity android:name="com.sensorsdata.analytics.android.sdk.dialog.SchemeActivity" android:configChanges="orientation|screenSize" android:exported="true" android:launchMode="singleTask"> <intent-filter> <action android:name="android.intent.action.VIEW" /> <category android:name="android.intent.category.BROWSABLE" /> <category android:name="android.intent.category.DEFAULT" /> <data android:scheme="您项目的 scheme" /> </intent-filter> </activity> After obtaining the Scheme, configure the Scheme in the Activity tag in the AndroidManifest file, taking MainActivity as an example:
<activity android:name=".MainActivity"> <!-- 在 MainActivity 中配置 Scheme--> <intent-filter> <action android:name="android.intent.action.VIEW" /> <category android:name="android.intent.category.BROWSABLE" /> <category android:name="android.intent.category.DEFAULT" /> <data android:scheme="您项目的 Scheme 值" /> </intent-filter> </activity> When configuring the Scheme, the intent-filter needs to be configured separately and should not be mixed with other intent-filters. The Scheme should not be configured in the intent-filter that contains '<action android:name="android.intent.action.MAIN" />', which will cause the application to fail to open.
4. SDK basic configuration.
4.1. Enable Auto-Track.
When initializing the SDK, the 'setAutoTrackEventType()' method can be used to configure the types of Auto-Track to enable. For detailed usage documentation, please refer to the Basic API Introduction.
4.2. User Identification.
User identification is used to uniquely identify users and improve the accuracy of user behavior analysis. Currently, Sensors Analytics provides simple user identification and cross-domain user identification for different business scenarios.
4.3. Set Common Event Properties.
Attributes that need to be added for all events can be passed after initializing the SDK registerSuperProperties() Register the property as a public property. See the detailed usage documentationBasic API function introduction.
4.4. Record activation event
You can call trackAppInstall() method records activation events, and calling this method multiple times only triggers the activation event on the first call. See the detailed usage documentationChannel tracking and advertising.
4.5. Code bury trace event
After SDK initialization, you can track() method tracks user behavior events and adds custom properties to events. See the detailed usage documentationBasic API function introduction.
5. Debugging Displays event information
When initializing the SDK, perform the following configuration to enable the log output function of the SDK:
// 打开 SDK 的日志输出功能 saConfigOptions.enableLog(true); In Logcat 中筛选 SA. keywords:
- When the buried event is successfully triggered, the SDK will outputtrack event data at the beginning of a field.
- When the buried event fails to trigger, the SDK will output the corresponding cause of the error. Common exceptions include JSON
- If the event data is reported successfully, the SDK will output it valid message event data at the beginning of a field.
- When event data fails to be reported, the SDK will output invalid message event data at the beginning of the field and output the cause of the error
6. SDK Optional configuration
6.1. Connect App and H5
When initializing the SDK, perform the following configuration to enable the App to connect to H5
// 开启 App 打通 H5 saConfigOptions.enableJavaScriptBridge(boolean isSupportJellyBean); isSupportJellyBean:Whether API level 16 or later is supported. Get through WebView 的 addJavascriptInterface() method implementation, but at API level 16 and below,addJavascriptInterface() method has security vulnerabilities, so use it with caution.
The connect function takes effect only when the App and H5 are enabled at the same time. For details about how to enable H5, seeApp connect H5.
The X5 kernel opens and is added after initialization SensorsDataAPI.sharedInstance().showUpX5WebView(WebView,true);
In addition to the above code, the WebView of UC kernel needs to be added in the plug-in configuration:addUCJavaScriptInterface = true this option, In main module level build.gradle file add our extensions are as follows;
sensorsAnalytics{ addUCJavaScriptInterface=true } 6.2. Visualized Tracking
Call enableVisualizedProperties in SDK initialization to enable visualized tracking. For detailed usage, please refer to the Basic API Functions and the introduction to visualized tracking.
Note: The content of this document is a technical document that provides details on how to use the Sensors product and does not include sales terms; the specific content of enterprise procurement products and technical services shall be subject to the commercial procurement contract.
 Popular Searches