Quick App SDK
|
Collect
- Before using, please readData model
- SDK Update Log, please refer to the Release Notes
1. Integrate Sensors Analytics SDK
1.1. Import SDK
- Get the Quick App SDK source code from GitHub;
- Put the sensorsdata.min.js file into the corresponding directory of your project;
- Import the SDK in the app.ux file using import.
import sensors from './sensorsdata.min.js';The compressed file size of Quick App SDK is about 12 KB.
1.2. Configure initialization parameters
After importing the SDK, you can configure the SDK initialization parameters using the setPara() method:
sensors.setPara({ name: 'sensors', server_url: '数据接收地址' });1.3. Initialize the SDK
After configuring the initialization parameters with setPara(), you can initialize the SDK with the init() method:
// 初始化 SDK export default { onCreate() { // 必须传入this,不然在Page中无法引用sensors sensors.init(this); } }Before calling the init() interface, the collected data is cached in memory; after calling the init() interface, the cached data is sent over the network.
2. SDK Basic Configuration
2.1. Configure the project's data receiving address
Get the data receiving address as shown in the figure below:
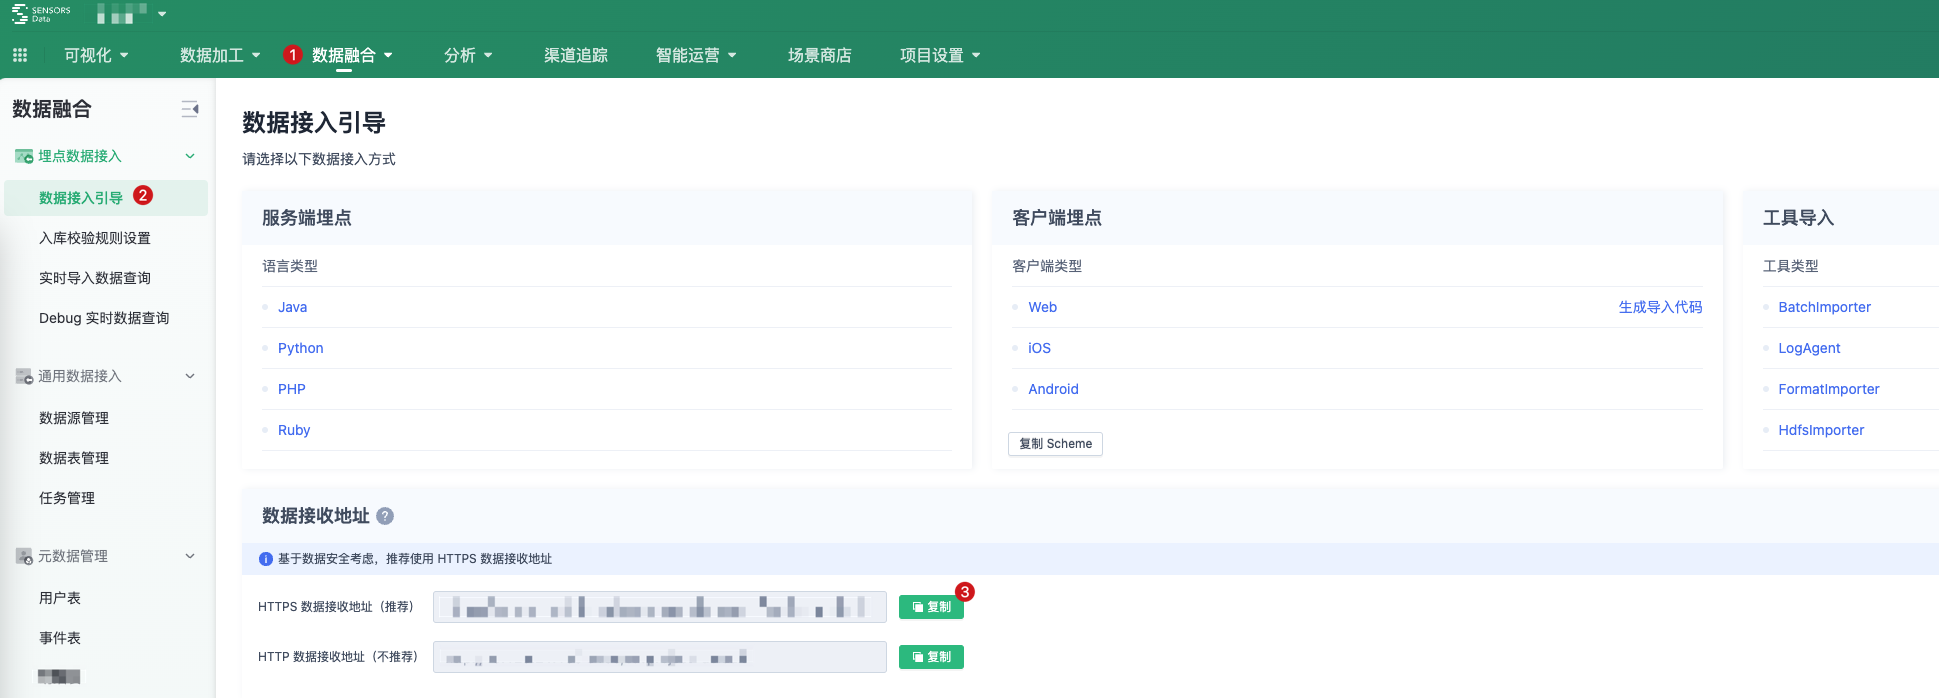
After obtaining the data receiving address, set the server_url in the setPara interface.
2.2. Open the full burial point
export default { onCreate () { sensors.init(this); // 开启 $AppStart(App 启动)事件采集 sensors.appLaunch(); } }// src 目录下的页面 export default { onShow() { // 开启 $AppViewScreen(App 浏览页面)事件 sensors.pageShow(); } }2.3. Set Event Common Properties
Properties that need to be added to all events can be registered as common properties before initializing the SDK by calling registerApp() Register the properties as common properties:
sensors.registerApp({ userLever: 'VIP3', userSex: '男' });2.4. User Login
When a user registers or logs in successfully, call the login() method and pass the login ID:
sensors.login("登录 ID");For users who have automatic login, you can get the login ID before SDK initialization and call the login() method.
2.5. Code Tracking Events
After SDK initialization, you can track user behavior events and add custom properties to events using the track() method:
sensors.track(event_name [,properties]);Configure parameters:
| Parameter | Required | Description |
|---|---|---|
| event_name | Yes | Event name |
| properties | No | Add custom properties to user behavior events, type: Object. |
Example:
// 为 click 事件添加自定义属性 name 值为点击。 sensors.track('click',{ name: '点击' }); For the format specification of event name and event properties, please refer to Data format.
3. Debug and View Event Information
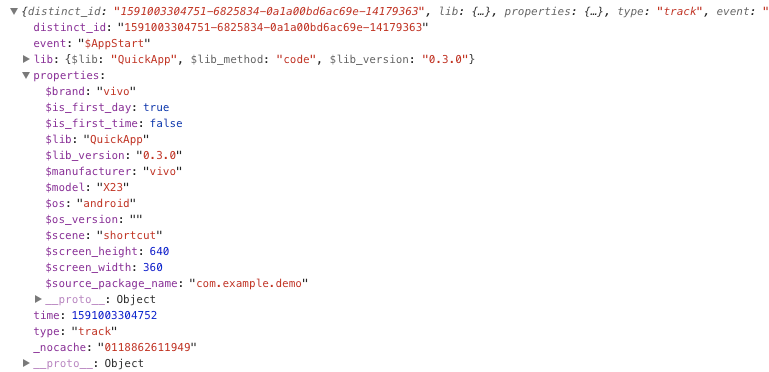
3.1. Event trigger log
setPara() When configuring the initialization parameters, the collected data information will be printed by the console of the Quick App development tool after opening the Log function (default enabled) by show_log: true:
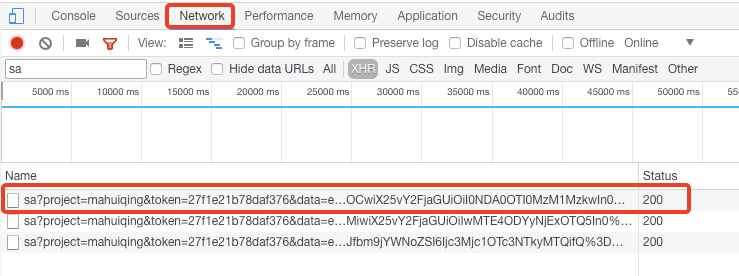
3.2. Event sending status
When the event data is successfully sent, you can view the Network module in the Quick App development tool to see the request of sa:
4. Optional SDK configuration
4.1. Set user attributes
setProfile( properties ): You can set user attributes. When setting the same key multiple times, the value will be overwritten and replaced:
sensors.setProfile({ email:'xxx@xx', favoriteFruits: ['苹果', '油桃'], subscribers: 7277 });- For the difference between event properties and user properties, please refer to Data model
- For the naming constraints of user properties, please refer to Data format
- For other methods of setting user properties, please refer to User attribute settings
Note: The content of this document is a technical document that provides details on how to use the Sensors product and does not include sales terms; the specific content of enterprise procurement products and technical services shall be subject to the commercial procurement contract.
 Popular Searches