Integration Documentation (WeChat Mini Program)
|
Collect
- Before using, please read the data model.
- SDK update log, refer to Release Notes.
1. Integrate Sensors Analytics SDK
1.1. Two Initialization Methods
- It is recommended to use IDM 3.0. It ensures immediate initialization, no data loss, and better user association.
- If you are an existing user and want to change the initialization method from IDM - 2.0 to IDM - 3.0, please ask the on-duty colleagues to confirm if the SA version supports it. Also, the WeChat Mini Program SDK version >= 1.17.6
app.js
import sensors from '/dist/wechat/sensorsdata.esm.js' // 配置初始化参数 sensors.init({ name: 'sensors', server_url: '您的数据接收地址', // 全埋点控制开关 autoTrack:{ appLaunch: true, // 默认为 true,false 则关闭 $MPLaunch 事件采集 appShow: true, // 默认为 true,false 则关闭 $MPShow 事件采集 appHide: true, // 默认为 true,false 则关闭 $MPHide 事件采集 pageShow: true, // 默认为 true,false 则关闭 $MPViewScreen 事件采集 pageShare: true, // 默认为 true,false 则关闭 $MPShare 事件采集 mpClick: false, // 默认为 false,true 则开启 $MPClick 事件采集 mpFavorite: true, // 默认为 true,false 则关闭 $MPAddFavorites 事件采集 pageLeave: false // 默认为 false, true 则开启 $MPPageLeave事件采集 }, // 是否允许控制台打印查看埋点数据(建议开启查看) show_log: true }); // 如果需要使用 Openid 作为匿名 ID wx.request({ url: '后端获取 OpenID 的请求', success: function(res){ if(res.OpenID){ sensors.bindOpenid(res.OpenID); } } }); App({ onLaunch : function( options ){}, onShow : function( options ){}, onHide : function(){} });- If you do not need IDM 3.0 temporarily, it is recommended to use this method.
- If you need to use Openid as the anonymous ID, it is recommended to use IDM 3.0. Otherwise, if the acquisition of Openid is asynchronous, the event of full-link tracking and other events will be sent using the UUID generated by the SDK before the identification.
- If init is executed after waiting for a certain period of time (such as waiting for Openid to be obtained), if the Mini Program is closed immediately at this time, data will be lost! Not recommended.
app.js
import sensors from '/dist/wechat/sensorsdata.esm.js' // 配置初始化参数 sensors.setPara({ name: 'sensors', server_url: '您的数据接收地址', // 全埋点控制开关 autoTrack:{ appLaunch: true, // 默认为 true,false 则关闭 $MPLaunch 事件采集 appShow: true, // 默认为 true,false 则关闭 $MPShow 事件采集 appHide: true, // 默认为 true,false 则关闭 $MPHide 事件采集 pageShow: true, // 默认为 true,false 则关闭 $MPViewScreen 事件采集 pageShare: true, // 默认为 true,false 则关闭 $MPShare 事件采集 mpClick: false, // 默认为 false,true 则开启 $MPClick 事件采集 mpFavorite: true, // 默认为 true,false 则关闭 $MPAddFavorites 事件采集 pageLeave: false // 默认为 false, true 则开启 $MPPageLeave事件采集 }, // 是否允许控制台打印查看埋点数据(建议开启查看) show_log: true }); sensors.init(); App({ onLaunch : function( options ){}, onShow : function( options ){}, onHide : function(){} });1.2. Introduction of Different Frameworks
- Get the WeChat Mini Program SDK source code from GitHub
- In app.js file By require() import SDK
app.js
var sensors = require('/dist/wechat/sensorsdata.cjs.js'); // 这里举例使用的是全域用户关联 - IDM 3.0 初始化方式 ,也可以按实际需求换成上面 1.1 中的简易用户关联 - IDM 2.0 初始化方式 sensors.init({ name: 'sensors', server_url: '您的数据接收地址', show_log: true }); App({ onLaunch : function( options ){}, onShow : function( options ){}, onHide : function(){} });- By npm i sa-sdk-miniprograminstall SDK
- In main.js , By import import SDK
main.js
import Vue from 'vue'; import sensors from '/dist/wechat/sensorsdata.esm.js' // 这里举例使用的是全域用户关联 - IDM 3.0 初始化方式 ,也可以按实际需求换成上面 1.1 中的简易用户关联 - IDM 2.0 初始化方式 sensors.init({ name: 'sensors', server_url: '您的数据接收地址', show_log: true }); import App from './App'; Vue.config.productionTip = false; App.mpType = 'app'; const app = new Vue({ ...App }); app.$mount();- By npm i sa-sdk-miniprograminstall SDK
- In app.jsx 中通过 import import SDK
app.jsx
import Taro, { Component } from '@tarojs/taro' import Index from './pages/index' import sensors from '/dist/wechat/sensorsdata.esm.js' // 这里举例使用的是全域用户关联 - IDM 3.0 初始化方式 ,也可以按实际需求换成上面 1.1 中的简易用户关联 - IDM 2.0 初始化方式 sensors.init({ name: 'sensors', server_url: '您的数据接收地址', show_log: true }); class App extends Component { config = { pages: [ 'pages/index/index' ], window: { backgroundTextStyle: 'light', navigationBarBackgroundColor: '#fff', navigationBarTitleText: 'WeChat', navigationBarTextStyle: 'black' } } constructor(){ super(); } }taro may not run properly when SDK (imported as file or via npm) is compiled for the second time. You need to compile taro > compile configuration details > mini (configuration for exclusive mini program).Exclude files that do not need to be compiled by Taro during the configuration of the WeChat Mini Program compilation process. Please refer to the official documentation of Taro for specific usage.
- By npm i sa-sdk-miniprograminstall SDK
- In main.js By import import SDK,Note Before vue import
main.js
import sensors from '/dist/wechat/sensorsdata.esm.js' import Vue from 'vue'; import App from './App'; // 这里举例使用的是全域用户关联 - IDM 3.0 初始化方式 ,也可以按实际需求换成上面 1.1 中的简易用户关联 - IDM 2.0 初始化方式 sensors.init({ name: 'sensors', server_url: '您的数据接收地址', show_log: true }); Vue.config.productionTip = false; App.mpType = 'app'; const app = new Vue(App); app.$mount();- By npm i sa-sdk-miniprograminstall SDK
- In app.wpy 中通过 import import SDK
app.wpy
import sensors from '/dist/wechat/sensorsdata.esm.js' import wepy from 'wepy'; // 这里举例使用的是全域用户关联 - IDM 3.0 初始化方式 ,也可以按实际需求换成上面 1.1 中的简易用户关联 - IDM 2.0 初始化方式 sensors.init({ name: 'sensors', server_url: '您的数据接收地址', show_log: true }); export default class extends wepy.app { onLaunch(option) {} }- Detailed initialization configuration parameters can refer toWeChat Mini Program SDK API Documentation
- It is recommended to call setPara() immediately after importing the SDK using require or imports to configure the initialization parameters. This prevents delay in configuration, which could result in the inability to delegate element click event handling functions and inability to collect pre-set element click events.
- Before call init() the interface, the collected data is cached in memory; call init() the interface, the cached data will be sent out via the network.
2. SDK Basic Configuration
2.1. Configuring Project Data Receiving URL
Obtaining the Data Receiving URL as shown in the figure below:
- After obtaining the Data Receiving URL, set the server_url in the setPara interface. The server_url domain needs to be configured in the WeChat backend request domain list according to WeChat Mini Program requirements (https://developers.weixin.qq.com/miniprogram/dev/framework/ability/network.html).
2.2. Setting Common Event Properties
For properties that need to be added to all events, register the properties as common properties before initializing the SDK by calling registerApp():
getApp().sensors.registerApp({ userLever: 'VIP3', userSex: '男' });registerApp() method must be called before the App instantiation to complete the registration of common properties, otherwise some data collection will not capture the registered common properties.
2.3. User Association
User association is used to uniquely identify users and improve the accuracy of user behavior analysis. Currently, Sensors Analytics provides simple user association and universal user association for different business scenarios.
2.4. Tracking Events with Code Instrumentation
After SDK initialization, you can track user behavior events and add custom properties to events using the track() method:
sensors.track(event_name [,properties]);Configuration Parameters:
| Parameter | Required | Description |
|---|---|---|
| event_name | Yes | Event Name |
| properties | No | Add custom properties to user behavior events, type: Object. |
For Example:
// 为 click 事件添加自定义属性 name 值为点击。 getApp().sensors.track('click',{ name: '点击' }); For the format specification of event names and event properties, please refer to Data Format.
3. Debugging and viewing event information
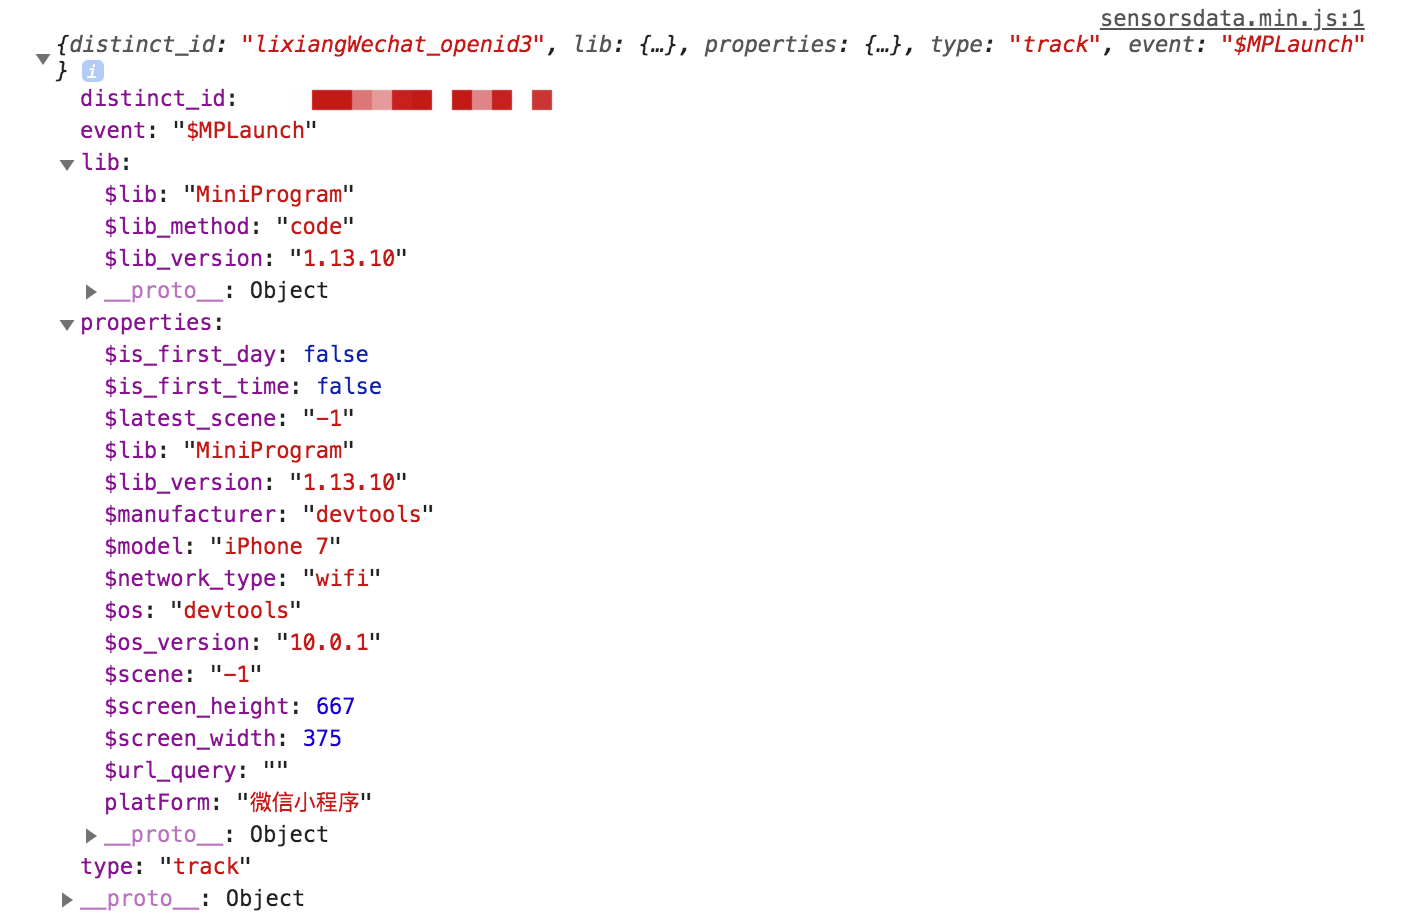
3.1. Event trigger logs
setPara() When configuring initialization parameters, open the Log function by using show_log: true and after the SDK is initialized (i.e., after the init() method call is completed), the WeChat Developer Tool console will print the collected data information:
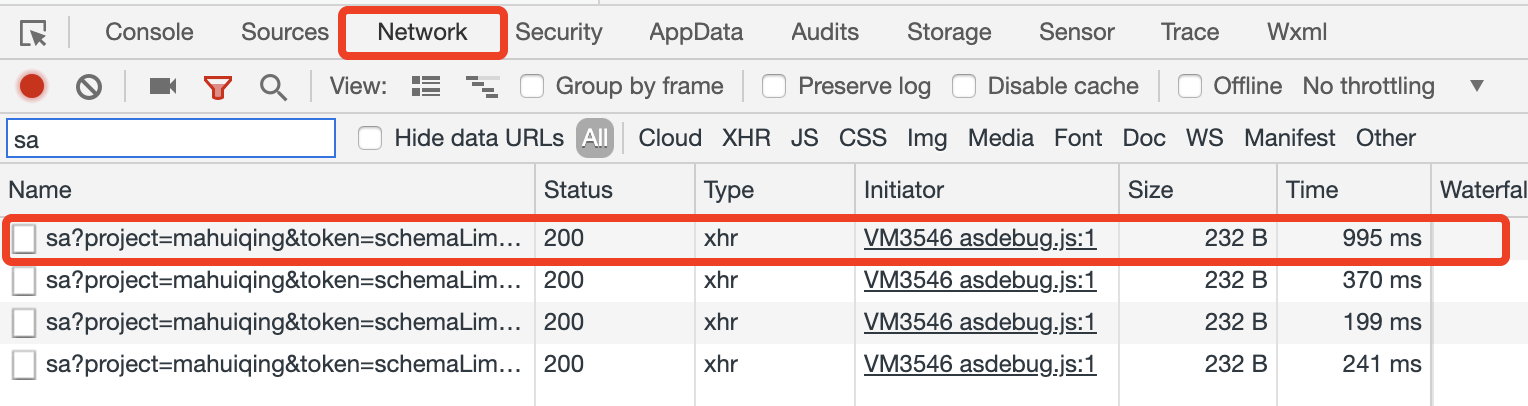
3.2. Event sending status
When the event data is sent successfully, you can see the sa request in the Network module of the WeChat Developer Tool:
4. Optional SDK configurations
4.1. Set user properties
setProfile( properties ): can set user properties. When the same key is set multiple times, the value will be overwritten:
getApp().sensors.setProfile({ email:'xxx@xx', favoriteFruits: ['苹果', '油桃'], subscribers: 7277 });- For the difference between event properties and user properties, please refer to data Model
- Naming constraints for user attributes, please refer todata format
- Other methods for setting user attributes, please refer tothe User Attributes Analysis.
4.2. Channel Track
When users access the mini program through a path containing the utm related parameters, the pre-set events $MPLaunch, $MPShow, $MPViewScreen will parse the utm related parameters in the launch path as their own properties and attribute values. The $latest_utm related properties will also be set to all events. This feature is effective throughout the mini program's lifecycle.
5. SDK API
For more mini program APIs, please refer to the SDK API (Mini Program).
Note: The content of this document is a technical document that provides details on how to use the Sensors product and does not include sales terms; the specific content of enterprise procurement products and technical services shall be subject to the commercial procurement contract.
 Popular Searches