Integration Documentation (Mini Games)
|
Collect
- Before using, please read the Data Model
- SDK Update Log, please refer to Release Notes
Notice:
- If you are using version 0.6.1 of the WeChat Mini Games SDK before May 15, 2016, please do not upgrade the SDK. If you have upgrade requirements, please consult with a technical consultant.
1. Integrate Sensors Analytics SDK
1.1. Import SDK
- Get the source code from GitHub, under
/dist/; - Put the
/dist/game-xx/index.esmfile into the Mini Game project; - In the game.js file, import the SDK using import.
import sensors from 'sensorsdata.es6.min.js'Folder downloaded reference:
| Directory under /dist/ | Meaning |
|---|---|
| game-bytedance | Bytedance Mini Game |
| game-wechat | WeChat Mini Game |
| game-qq | QQ Mini Game |
| game-h5 | H5 Games |
1.2. Enable Full Tracking
If you need to automatically collect events such as app launch (shown in mini program) and app exit (hidden in mini program), you can use the full tracking plugin.
import sa from '/dist/game-xx/index.esm' import autotrack from '/dist/game-xx/plugin/autotrack/index.esm' sa.use(autotrack,{ app_show: true, app_hide: true });1.3. SDK Initialization
After importing the SDK, you can configure the initialization parameters through init.
import sensors from '/dist/game-xx/index.esm' import autotrack from '/dist/game-xx/plugin/autotrack/index.esm' sensors.use(autotrack,{ app_show: true, app_hide: true }); sensors.init({ server_url: '数据接收地址' });1.4. Optional Initialization Parameters
The optional parameters in sensors.init are as follows
| Configuration Name | Default Value | Meaning |
|---|---|---|
| server_url | Empty string | Data receiving URL |
| show_log | false | Whether to display logs |
batch_send.send_timeout | 6000 | Send data every 6000 milliseconds |
batch_send.max_length | 6 | Send data after storing 6 records |
max_string_length | 500 | Up to 500 characters for reporting string attribute values, exceeding which will be truncated |
2. SDK Basic Configuration
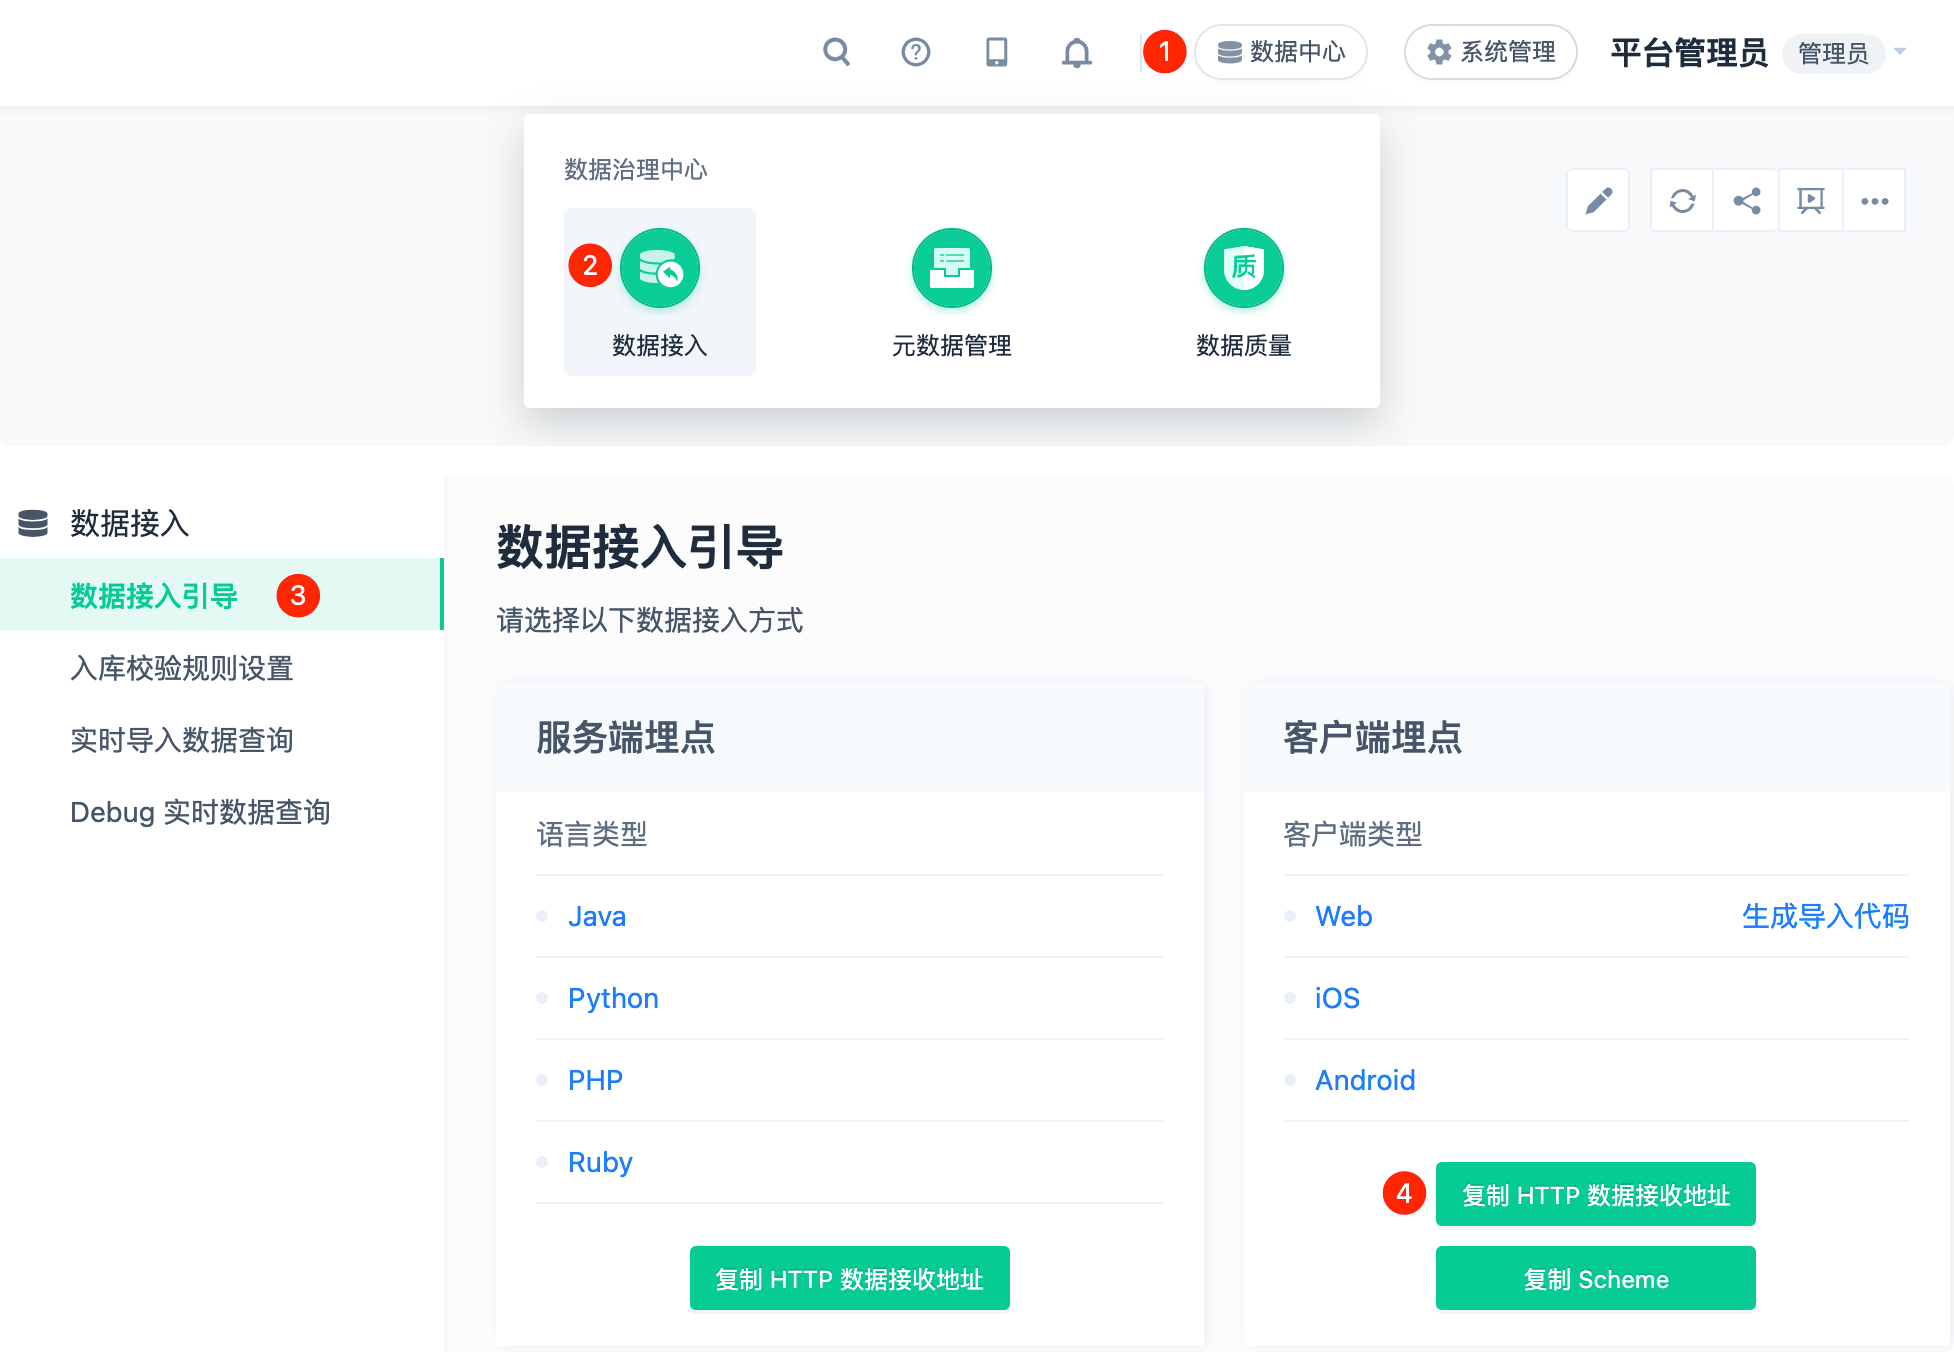
2.1. Configure the data receiving URL for the project
In SensAnalytics v2.2 and above, you can retrieve the data receiving URL as shown in the following figure. For retrieving the data receiving URL in other versions, you can switch to the corresponding document version to view:
- When packaging and publishing as WeChat/QQ/ByteDance (e.g., mini-games), you need to configure the domain for receiving data in the corresponding developer platform. For details, refer to: https://developers.weixin.qq.com/miniprogram/dev/framework/ability/network.html
2.2. Set event common properties
For attributes that need to be added to all events, you can register them as common properties by calling registerApp() before initializing the SDK:
sensors.registerApp({ userLever: 'VIP3', userSex: '男' });2.3. User login
When the user successfully registers or logs in, you need to call the login() method and pass the login ID:
sensors.login("登录 ID");For automatically logged in users, you can obtain the login ID and call the login() method before initializing the SDK.
2.4. Code tracking events
You can track user behavior events and add custom properties to events using the track() method:
sensors.track('click',{ name: '点击' }); 3. Debug and view event information
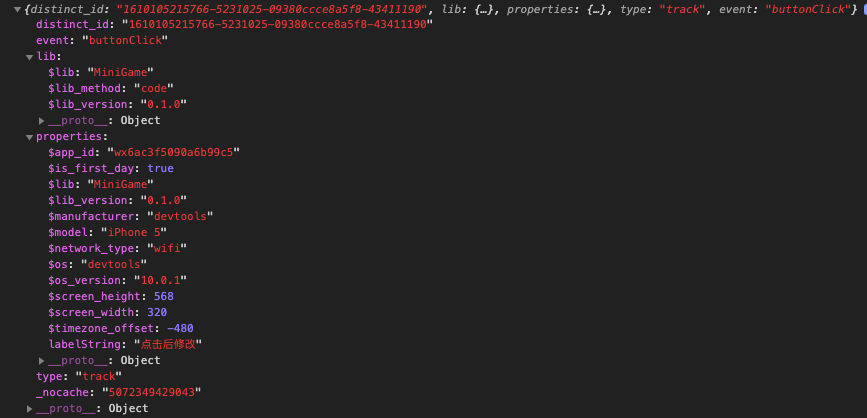
3.1. Event Trigger Log
init() When configuring initialization parameters, open the Log function by using show_log: true , and the developer tool console will print the collected data information:
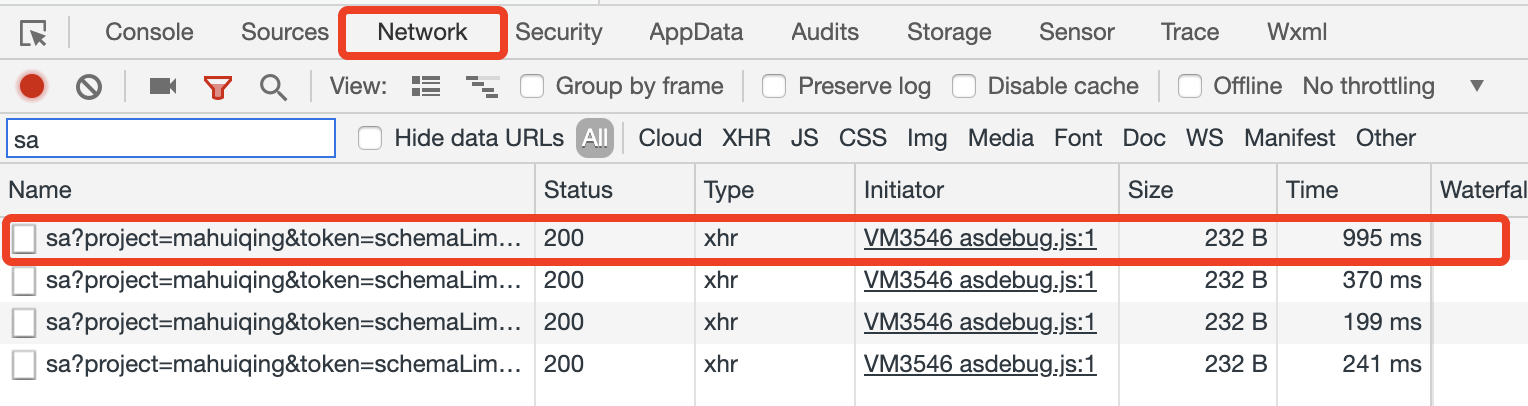
3.2. Event Sending Status
When the event data is sent successfully, you can see the request of sa in the Network module of the developer tool:
4. Optional SDK Configuration
4.1. Set User Properties
setProfile( properties ): You can set user properties. When the same key is set multiple times, the value will be overwritten and replaced:
sensors.setProfile({ email:'xxx@xx', favoriteFruits: ['苹果', '油桃'], subscribers: 7277 });- For the difference between event properties and user properties, please refer to the Data Model.
- For naming conventions of user properties, please refer to the Data Format.
- For details about how to set user properties, seeUser property setting
Note: The content of this document is a technical document that provides details on how to use the Sensors product and does not include sales terms; the specific content of enterprise procurement products and technical services shall be subject to the commercial procurement contract.
 Popular Searches